Followers

Thursday 28 December 2017

Butterflies on my tray with DMC stencils!

Hello...its the last Thursday of the year and I am here with my new project with DMC stencils.

These stencils are an amazing lot, the size is A4 and then stencil has more than one pattern in it and so it's easy to play around with it.

I have used some scrap wood to make a rustic serving tray today and the highlight is the DMC stencils!

I built a tray from scratch using some scrap wood .

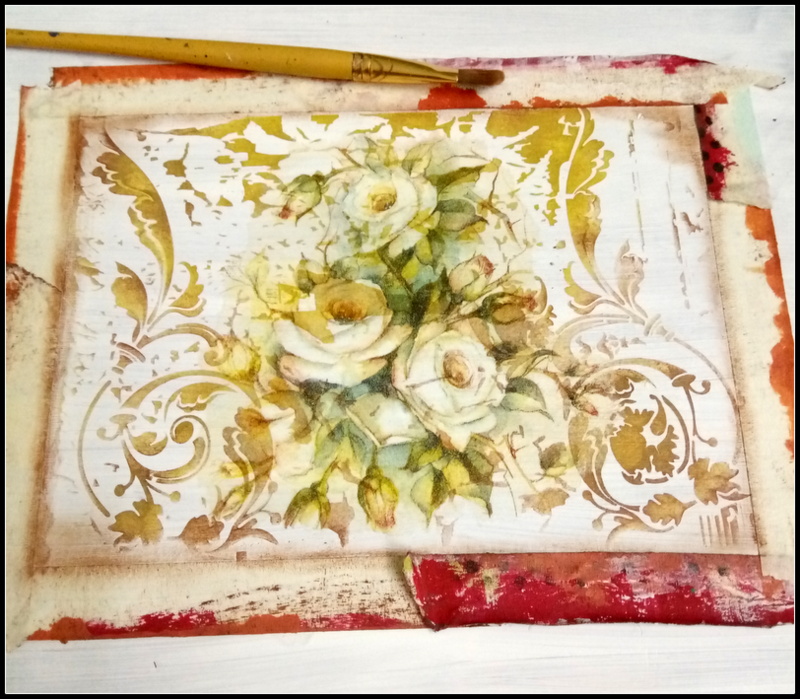
Next, I went about creating the faux palette look using chalk paints. This time I wanted a distressed shabby chic look!
Once the palette's took shape, I placed the script stencil from DMC and used a stencil brush to load color. This helped in giving a lovely faint effect, not too bright.


The same stencil had some faded dots and color splat designs, which too I have used in different place.


I then took out another stencil with numbers on it, and randomly stenciled these in blue!


Time to work on these steel handles. I sanded them and sponged in red chalk paint.


Once dry, I dry brushed with blue paint and distressed the edges with black Archival ink. They were ready!

I fixed the handles and then decoupaged some butterflies on the tray here and there, as if they were flying all over!


The tray was given 3 coats of water proof varnish with sufficient time to dry between coats . I finally sanded it a bit for a smooth finish and here it is, all ready to serve a cuppa!


 I love how the butterflies took to the scripted background and the faux palettes. Almost like home!!!

The number add more character to this tray!!


So here it is my rustic, shabby chic serving tray for the New year using DMC stencils! Wanna cuppa?? Cheers!!!
Wishing you all a very happy, colorful and creative 2018.
I will see you next year with more inspirations.


Until then,
Happy crafting and recycling.
Cheers,
Rupa

Products from Crafters Corner

Tuesday 26 December 2017

Shadow Box album with DCWV Blush papers & DMC accessories

Hey Everyone!!

Firstly wish you a Merry Christmas!
Welcome to crafters corner blog and today I am here with a brand new post.  You all know I love making albums and in this post I have an album for you but with a little twist.
Have you tried Idea-ology Configuration chipboard shadow book box?
If not, then you will love to try it after this post.

I have used this shadow book box to make shadow box album and I have also used DCWV Blush collection. You know I love trying different paper packs and DCWV is one of my favourite. Trust me you won't believe how beautiful this collection is until you try it.

First let's see the project,


Isn't this gorgeous?

I have altered Tim-Holtz Idea-ology shadow book box and gave it a whole new look with DCWV Blush papers.

Shadow Book Box


DCWV Paper Stack 12"X12" 48/Pkg
1/2 Sheets with gold foil, Printed Cardstock with gold foil

Along with this I have also used prima flowers, DMC fashion accessories etc.
There are 6 different kind of compartments in shadow box and you can arrange it as per your choice. i have used 3x4 inch of compartment on the top of the shadow box and made my cover page. I have not used few of the compartments as I wanted to put a mini album inside this book box. So, I have use only 4x6 inch of compartment inside, and put a mini album on the leftover space.

It's all upto you and your creativity that how you make use of this shadow box.

Let's see some more closeups,

I am sure you can figure out the beautiful Dress My Craft charms in this project, I have used big pearl, pastel pearls, sunshine flower etc in this shadow box album.


So, you can see there are two compartments inside and I have made a small mini book with the title, "Never lose your sparkle" 


And here I have a quick video of this project.


I hope you got some inspiration from this post. The products used are available at the store so go grab it. Do share your comments.

Wish  a very Happy & Crafty New Year in advance :)

Hugs,
Sampada

Thursday 14 December 2017

DMC Stencils grab bag!

Helloo...
Rupa here this THURSDAY with an upcycled project using the newly launched stencils by Crafters Corner!

Yes...these are DRESS MY CRAFT STENCILS (set of 12) amazingly intricate stencils.


These are A4 size stencils and can be used in many many ways...your creativity, your imagination and these stencils can create some amazingggg projects!
Here is one stencil that I have played with for this entire project! The beauty of these stencils is that there a a lot of elements in one stencil, there is a focal point and in the back ground, there are other small elements too which can be used separately or as a whole!

For today's project, I have upcycled an old wooden stool, a heirloom from my native place which is sure  to be more that 75 yrs!


Well at the end, this looks even more antique and precious and ofcourse a statement piece!


Let's jump start to the process...


I start by sanding the top and then apply a coat of gesso. Once dry, I have used the stencil and done a double shaded stenciling using chalk paints.

Next, using modepodge, I have decoupaged a floral tissue on top of the stenciled area. It amazing how the stencil work is seen thru the tissue!


Here is a close up of the tissue decoupaged on top of the stenciling! I love how vintage it is already looking! 


 I have then masked all the 4 sides and then done some distressing using  brush and paint.

I stenciled some little elements from the stencils on all the four sides and repeated the decoupage of smaller prints on the 4 sides.


Using some home made modelling paste and the same stencil, I have created texture on all the 4 sides. The intricate pattern of the stencil gives a nice, crisp texture!


Once the modelling paste is dry, I mask the sides again and have used chalk paints to created a shaded look .


Time to remove the masking tape and revel the final look! I did some dry brushing to highlight the textures and also to give some age to this project!


Then sealed the entire project with 2 coats of varnish and the stool was ready to make an appearance!


I love how this ONE STENCIL has helped me give this project an antique and priceless look! You can get creative and use the stencil in more than one way! I have combined decoupage with stenciling to create this project and loved the outcome!
Do let me know your thought about this project and GRAB that BAG of STENCILS today!


I will see you see you soon with more inspirations on these stencils!

Until my next creative journey,
Happy crafting and recycling.
Cheers.


Friday 1 December 2017

Inspired By Finnabair Art - Black Beauty

Hi my friends !I am delighted to Share my new MM project for Crafters Corner. Inspired by amazing Finn art , I create a canvas with a black beauty gesso.

For Background design of my canvas i used jeans cloth, my old brush, flowers, metal charms, textured stencil.

Last Step was add some micro beads with clear gesso or Mode podge.

Here is the step by step details
1st Project
******
1. I start with 9X5" canvas and added piece of jeans cloth. And i trim the edges. 


2. Then i applied mixer-ed texture paste with using bubble stencil design 
Mix paste - modeling paste + Aqua rose + Sparkling dust


3. I start adding embellishments for texture / 3D look (black gesso painted). I used my old brushes, finnabair metal charms center of my canvas


4. Applied only one color Prima wax paint on black part

5. Final step is adding glitters and flowers ( Prima Markting )


2nd Project - MM on small box


I wish you a great, creative weekend. 
Enjoy the days of winter
Hugs
Suzna

Supplies Used